
Hello, and thank you so much for your interest in this decoupage Christmas ornament tutorial. I’m so happy that you’re here!

This tutorial will show you how to make a Christmas ornament just like the one pictured above using a print made on a paper napkin. What? A napkin??
Yes, a regular white kitchen napkin!!! I know it might sound silly, but regular kitchen napkins can be printed on very easily using the method you will see outlined below. You can also print on paper towels by peeling them into two separate layers afterwards to get an extra thin pliable picture to decoupage with.
Thin paper like tracing paper or gift tissue wrap, or for this particular project, a napkin, is best for decoupage because it’s very pliable and soft and will mold to the ornament edges especially if you are creating a glass ball or bauble with rounded sides like the ones pictured below...
 |
Glass Christmas Ornaments can be purchased on Amazon (click underlined link above for more info) |
All of the supplies you will need for this project will be linked below for your convenience, however I will also link some of the supplies* throughout this blog post as they are explained.
Before you begin you will need to gather some supplies.
You will need:
To make a cardinal Christmas ornament like the one pictured at the top of this page, follow the DIRECTIONS below.
If you hav any questions at all, please leave them in the 'Comments' section below and I will get back to you as soon as possible.
You may also decide to use plastic Christmas ornaments which will work just as well. As a matter of fact, it might give you peace of mind to know they will not break. Of course, it's up to you!
Before you begin:
Gather all supplies. Paint your ornament using a sponge brush with white acrylic paint or white chalk paint and let it dry. Set it aside.
You will also need to have a napkin secured to a piece of computer paper paper set up to print on to. It will look like this when it is set up for printing...
 |
| printing. Notice the Scotch tape securing the napkin to the 8.5 x 11 paper |
After you make your napkin/computer paper, place it into the rear tray feed of your printer because you will be printing from that source.
It will look like this when it is in the rear tray before sending the print command...
 |
______________________________________________________________
To learn more about how to make a napkin to print on with your inkjet printer, watch the two videos below...
How to Find an Image, Resize and Download it to Print:
DIRECTIONS
Before you begin: Gather all supplies. Paint your ornament with white acrylic paint or white chalk paint and let it dry. Set it aside.
STEP 1:
"How to Find an Image, Resize and Download it to Print from WP"
1. You will need a picture to download and print from a word processing document. To find an image like the one used in this tutorial, use your favorite search engine and type in the words 'cardinal Christmas scene' and select 'Images' under the search bar if you're using a search engine like Duck Duck Go. Your results should look something like this if you are using Pinterest like I did...
 |
| The picture I selected is in the bottom right corner |
Watch the video below to learn how to go about downloading the image into a word processing program...
Decoupage Cardinal Christmas Ornament Tutorial
PART 1 - "Find a Picture on Pinterest, Download it to WP and Print"
STEP 2:
"Formatting & Printing Your Selected Image onto a Napkin"
Decoupage Cardinal Christmas Ornament Tutorial
PART 2 - "Formatting & Printing Your Image onto a Napkin"
STEP 3:
"Trimming and Applying the Image to the Ornament with Mod Podge"
1. Cut your image out around the edges.
2. Apply a coat of Mod Podge Matte Gel Medium to the surface of the ornament. By the way, you can also use wooden ornament blanks too.
3. While the Mod Podge is still wet, gently place your napkin or tissue print (inked side up) onto the surface of the ornament.
Make sure you do this gently as mentioned because the paper is extremely thin and will most likely rip if you are too forceful. If you do get a little tear don't worry, it can more than likely be covered up with a little paint later on.
4. When the cardinal image is totally dry on the surface of the ornament, trim the edges of the napkin or tissue with a scissor. It doesn't have to be perfect, you are just trying to get most of the excess off.
5. With a paint brush, once again cover the surface of the ornament with Mod Podge to secure the image to the ornament. This will keep your image from tearing and will give it a smooth finish. Do not worry that the Mod Podge is white because it will dry clear.
6. For more information on this Step(3), please watch the video below...
Decoupage Cardinal Christmas Ornament Tutorial
PART 3 - "Using Mod Podge to Place the Image to the Ornament
STEP 4:
"The Finishing Touches"
1. After the image dries overnight, use Mod Podge to go over the surface of the image (the inked side) to seal it up and keep the tissue from tearing. This will be your first coat. It does not have to be the glossy Mod Podge, either matte or glossy will work for this step.
2. After the surface of the ornament dries, take your paint brush and using either white glue or Mod Podge or even clear Elmer’s glue coat the sides of your ornament around the image. Sprinkle glitter over it while it’s wet and let it dry.
3. After the glitter dries, use Mod Podge to go over the surface of your image at least three times, letting it dry in between coats. Make the final coat with Mod Podge Gloss Lustre because this is the coat that you want to shine.
4. You may want to use Mod Podge once again to seal the glitter on the edges and keep them from falling off. Use the glossy version of Mod Podge and once again don’t worry if the Mod Podge looks white upon application because it will dry clear.
5. Attach a bow to the top of your ornament if you like.
Decoupaged Christmas Ornament Tutorial
Part 4 - "The Finishing Touches, Glitter and All That Fun Stuff"
SUPPLIES (You may need):
Glass Christmas Ornaments to Paint https://amzn.to/34rAdc0
Mod Podge Matte Gel Medium https://amzn.to/2Xh1idD
Mod Podge Gloss Lustre Medium https://amzn.to/3npb6NB
Glitter for Outside Edges of Ornament https://amzn.to/3mrAl1u
White Acrylic Paint https://amzn.to/3b4d00G
Paintbrushes https://amzn.to/3d6uScL
Inkjet Printer https://amzn.to/391bXx7
Arteza Paint Pens https://amzn.to/3cqpEYt
Sharpie Permanent Markers https://amzn.to/3eStQ4a
Sharpie Ultra Fine Black Marker (for outlines) https://amzn.to/2DOIkot
Deco Art White Paint Pen https://amzn.to/2DzQX6D
Paint Markers https://amzn.to/2XGYzep
White Chalk Paint https://amzn.to/3752uq0
Computer Paper https://amzn.to/3ir89L1
Scotch Tape Refills https://amzn.to/3n2j7bp
White Gift Tissue https://amzn.to/3mZSV0T
Tracing Paper https://amzn.to/3pypaWL
Tissue Box https://amzn.to/3mVigsU
Large Clear Sparkly Glitter https://amzn.to/3hH9my
Tiffany Stained Glass Gift Tissue https://amzn.to/38UnErg
Tulip 3-Dimensional Metallic Paint https://amzn.to/3s3aj8V
See most of my PAINTED ROCK ART here:
https://www.pinterest.com/nancygirlrocks/hand-painted-rocks-by-nancymaggielee/
Learn How to Hand-Paint Flower & Fairy Garden Rocks
https://feltmagnet.com/painting/hand-painted-rocks
Looking for a fun gift for someone in your life? Check out my Zazzle store... https://www.zazzle.com/store/maggieleeflowers/products
I have t-shirts, coffee mugs, Christmas ornaments, phone cases, office accessories, just to name a few!
Here are some links to my ROCK PAINTING websites, I hope you will visit
Crafty Girls Rock https://www.craftygirlsrock.net
Hand-Painted Flower & Fairy Rocks https://handpaintedflowerandfairyrocks.blogspot.com/
Hand-Painted Rocks https://handpaintedrocks.craftygirlsrock.net/
Painting Rocks! https://rockpaintingrocks.craftygirlsrock.net/
As always, if you have any questions or comments, please leave them in the 'COMMENTS' section below a video that you have watched or on the blog post where you found the information, and I will get back to you as soon as possible. I will check the comments on a regular basis.
I hope you enjoyed this craft tutorial. Please like and subscribe to my YouTube channel for more crafting videos! Until then, remember...
Be creative, and be happy!
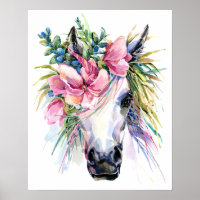 Watercolor Floral Unicorn Poster
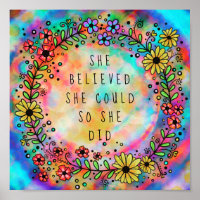 “She Believed She Could So She Did” Inspirational Poster
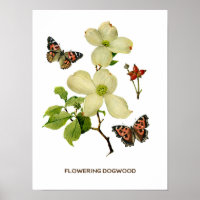 Vintage Flowering Dogwood Botanical Poster
 Just a Girl who Loves Horses, Poster Paper (Matte)
 Isn’t Yours to Carry Poster
 Fun Floral “Be Somebody” Classroom Poster
 Sunshine Yellow Pansy Flowers Watercolor Painting Poster
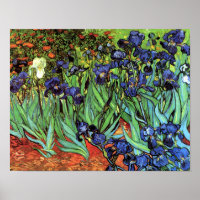 Irises by Van Gogh Fine Art Poster Print
 Plant Smiles Cheerful Inspirational Poster
 Inspirivity ‘personalize it’ ONE WORD Poster
 Fine Art Floral Decoupage Poster Wrapping Paper
 Inspirational “Make it Happen” Fun Tree Classroom Poster


No comments:
Post a Comment