
Hello, and thank you for joining me for this Easter egg decoupage tutorial!
In any case, once you start with this craft, you may need a whole year to make decoupage Easter eggs anyway so you better get started!

If you would like to make an Easter egg similar to the one pictured above, please read on.
Using thin paper for decoupage projects is really a great way to make beautiful projects for this holiday.
Sometimes, though, the thin pre-made papers that we can purchase which are great for decoupage projects, such as napkins and gift tissues, have designs that are too large or small and this can limit our creativity.
But not for long because...
In this post, I am going to show you how to print any image you can find online to make your own decoupage paper!
Before you print your image to make your own decoupage prints for an Easter egg like the one in this tutorial, you will need to set up your napkins to print onto. So please read on...
--------------------------------------------------------------------------------------------------
Before you begin with the directions below, watch the video in this section to learn how to make napkins to print onto. You can use white gift tissue or regular white kitchen napkins:
"How to Make Napkin Prints for Decoupage Projects"
Basic Directions in above video (watch for more detail)
1. Cut a napkin to within 1" of the border of a piece of standard size computer paper so that you have enough room to tape it to most of the paper.
2. Tape the napkin piece to the computer paper with Scotch tape.
3. Insert the napkin/computer paper into the rear tray of your printer, or face side down in the printer tray, see pic below...

4. Print your image onto the computer/napkin paper.
-------------------------------------------------------------------------------
The reason that napkins work so well for decoupage projects is because when the images are cut from the napkin and glued to the project with Mod Podge, or clear Elmer's glue, they seemingly fold into the background making the image look as if it was painted on.
If, however, you do not want to go through the process of making your own prints, there are many decoupage papers or napkins for many different occasions that you can purchase online. Like the package of thin glossy Easter prints pictured here...
 |
Glossy Decoupage Paper Sheets (click the above link for more info on this product) |
After you watch the video above, "How to Make Napkin Prints for Decoupage Projects", we will need to download a picture into word processing so that it can be formatted to print on a napkin.
1. For this Easter egg decoupage project, I recommend using Pinterest to find an image. Go into Pinterest and type 'Easter images' in the search bar at the top of the page. The results should look similar to the one pictured here below...
 |
| PINTEREST SEARCH RESULTS for 'Easter Images' |
You may want to watch the video directly below before you move on to the next steps to make it easier as you follow along. It's not necessary to watch it first, but it might give you a better understanding of the process...
Please note that for the next steps I will be using different Easter images than the one for this tutorial (picture at the top of this page). The images may be different, but the process is the same...
2. Once you are in Pinterest, decide on an image you would like to put on your egg. (This may be the hardest part, because there are so many 😄)
3. Using your mouse, hover over the image you have selected. 'Left click' on the image with your mouse. The image will now be larger at the top of your screen. Always save from a larger image to get a clearer picture.
4. Now that the image is at the top of the screen, use your mouse again, but this time 'right click' on it. A menu of choices will appear and from that menu. Select 'Copy image' (as shown in the picture below)...
 |
| Hovering over larger image at the top of PINTEREST page, left click with mouse and select 'Copy image' |
5. Now that you have selected 'Copy image' from the choices, move into a blank word processing program (you should probably have one open in another window to make things easier), 'right click' and select 'Paste'. It will look something like the picture here...
 |
| Easter Image 'Pasted' into a Word Processing Document |
6. Now that the image has been 'pasted' into the word processing document, 'left click' on the image and a thin black line will appear around the outside with four small circles on each corner. Hold your wooden egg up to the screen to get a general idea of the size you will need for your project using the image on the screen as a guide since it will be true to size once printed.
'Left click' on the corner of the image with your mouse and move it back and forth to get the right size. See picture below...

7. Once you determine the right size, you can change the shape of the picture by hovering over it and clicking on it once again. The thin black line will appear and under your 'Home' keys at the top of your page, you will find 'Picture Format'. Here you can change the color, contrast, brightness and shape of your image...
 |
| Change the shape, color, contrast and brightness of your image before printing on a napkin. You can also flip the image horizontally here. |
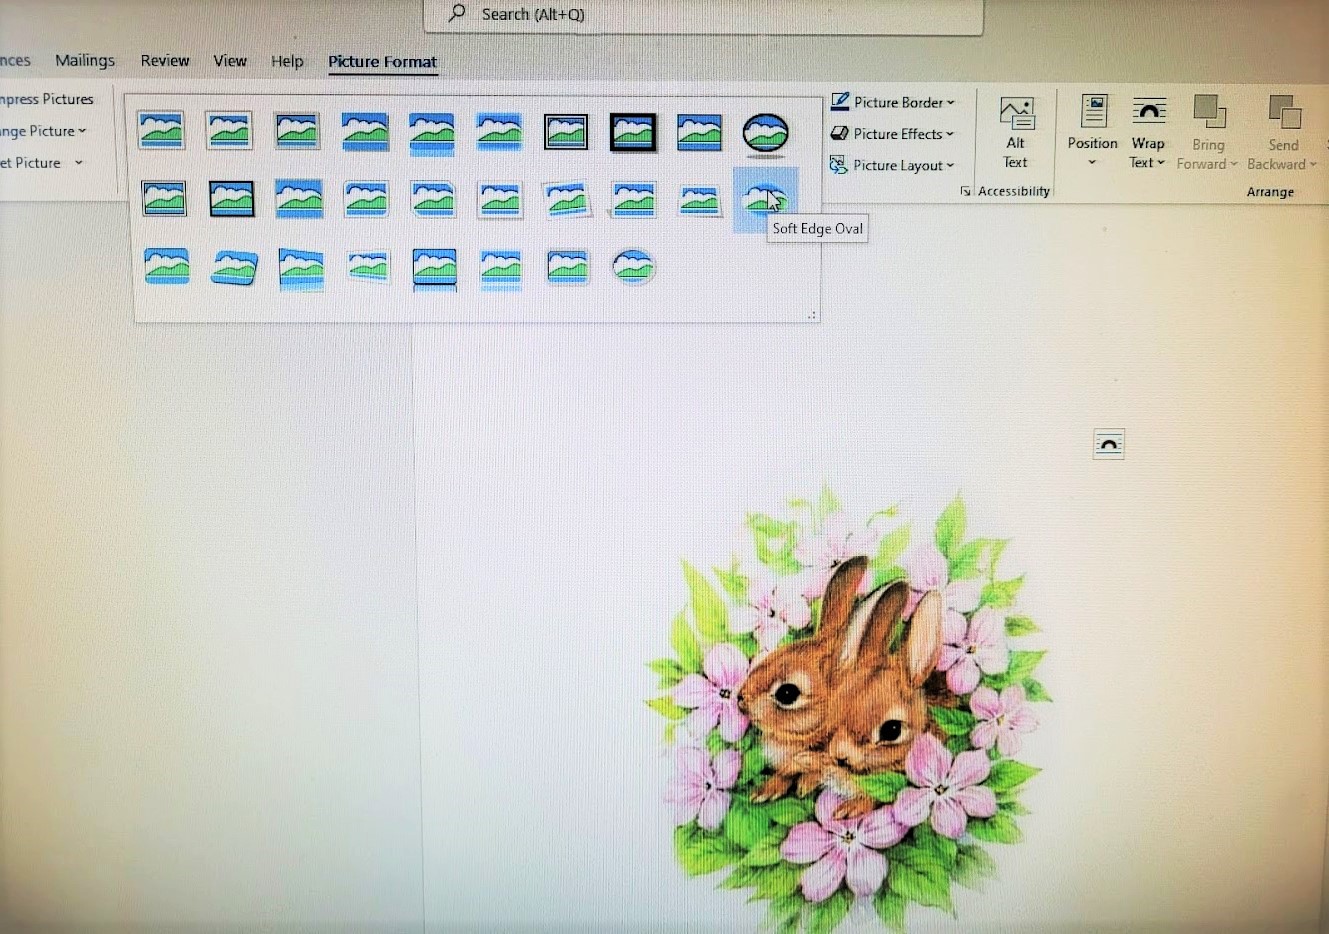 |
| Changing the shape of your image to an oval is best for an Easter egg project. It's always good to use the right shape for your decoupage canvas since it makes it easier to adhere. |
8. This is what my image looked like in WP for the Easter egg in this tutorial...

9. Make sure your napkin/computer paper is loaded into the rear tray of your printer. Send your image to print to the rear tray by using your 'Advanced Print Commands'. (If you need help in creating the napkin to print on, refer to the video linked here..."How to Make Napkin Prints for Decoupage Projects").
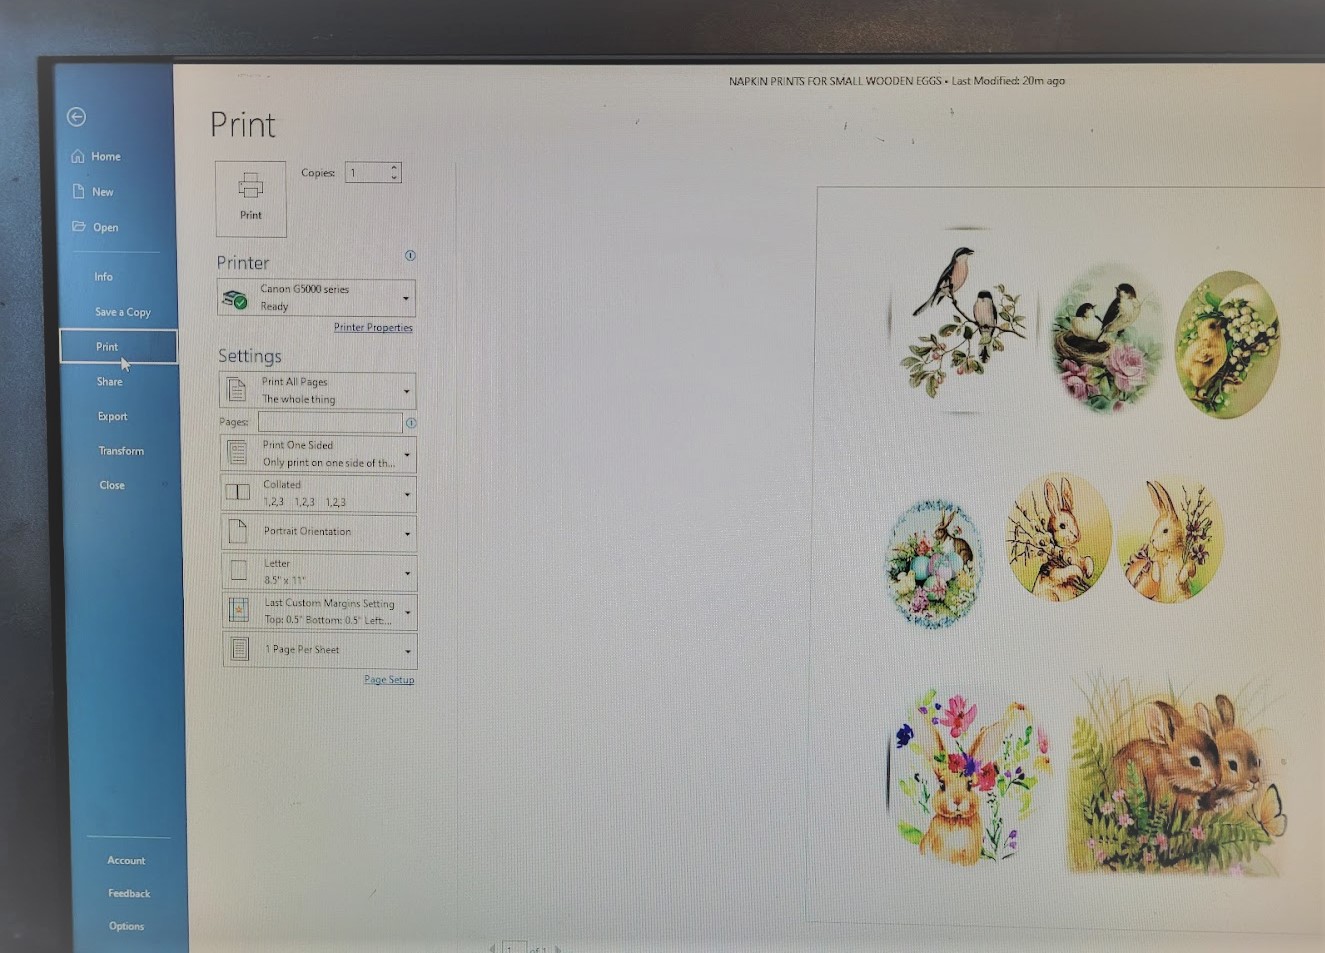
For the next part of this tutorial I will demonstrate using this collection of small oval Easter images that I have saved on one page of a word processing document...
 |
| You can fit quite a few smaller images onto one sheet of napkin/computer paper to print Notice how all images have been formatted to a 'soft edge oval' |
10. While in the word processing document with your Easter images downloaded, select 'File' at the top of the screen, then select 'Print' from that menu. After that, you should see something called 'Printer Properties'. It should look something like this...


12. Print out a watercolor frame using the same method that you used to find and print your Easter image from Pinterest. Print the flower frame onto gift tissue or a napkin and apply it to the outer edges of the Easter image on the front of the egg.
Mine looked like this before I printed it onto a napkin...

Cut out the flower frame images from the napkin and apply them to the outer edge of the main image.
13. Add glitter to some of the flowers on your egg. Just squeeze out a little clear Elmer's glue on some of the images and sprinkle the glitter on! After it is dried completely, apply some pastel paint to the back of the egg to add extra Easter color.
And after the pastel paint is thoroughly dry, apply a few coats of Mod Podge over the whole egg to seal it up and give it some extra shine and the finishing touch!

SUPPLIES: (As throughout this blog post, clicking on the link underneath a picture or the underlined link will take you to the Amazon page where you can learn more about the product; if you purchase through this link I will earn a small commission at no cost to you)

(if you don't want to make your own prints...)
 |

You will want to give a base coat of white acrylic paint to any egg that you are going
to decoupage because when you apply the napkin or gift tissue, it will look best against
a very light background....
 |

 |
| Pastel Paint Colors (great for painting the backside of the egg!) |


No comments:
Post a Comment